iPhone ProRes RAW with GyLog and Gyroflow
Use this workflow to stabilize iPhone ProRes RAW footage with gyro data recorded by GyLog.
The basic idea is simple: record motion data with GyLog, shoot ProRes RAW with Blackmagic Camera, create per-clip .gcsv files with GyLogSync, then use Gyroflow Desktop and a Gyroflow plugin in a compatible video editor such as DaVinci Resolve.
Applies To
- Camera: iPhone shooting ProRes RAW in Blackmagic Camera
- Logger: GyLog for iPhone
- Recording storage: Compatible external USB-C storage for ProRes RAW
- Sync tool: GyLogSync (currently Mac only)
- Stabilization: Gyroflow Desktop and a Gyroflow video editor plugin
- Editing: A compatible video editor such as DaVinci Resolve. For full-resolution Open Gate work in DaVinci Resolve, use DaVinci Resolve Studio.
- Last updated: 2026-05-19
This page is for an iPhone-only workflow. It does not cover mounting a smartphone on a mirrorless camera.
At the moment, GyLogSync is available for Mac only. When the Windows version is released, you can read "computer" on this page as Mac or Windows.
Download Links
- GyLog website
- GyLog for iPhone on the App Store
- Blackmagic Camera on the App Store
- GyLogSync for Mac (currently Mac only)
- Gyroflow Desktop and video editor plugins
- iPhone ProRes RAW PowerGrade
Workflow Overview
- Start GyLog on the iPhone.
- Shoot ProRes RAW with Blackmagic Camera.
- Stop GyLog and send the
.gcsvfile to your computer. - Put the video files and
.gcsvinto GyLogSync on your computer. - GyLogSync creates a separate
.gcsvfile for each video clip. - Open each video and matching
.gcsvin Gyroflow Desktop. - Save a
.gyroflowproject file. - Use a Gyroflow plugin in a compatible video editor, such as DaVinci Resolve, for stabilization.
What You Need
-
iPhone An iPhone that can shoot ProRes RAW in Blackmagic Camera.
-
Blackmagic Camera This is the camera app used for recording video.
-
GyLog This is the app used to record gyro data.
-
Computer You will use GyLogSync. At the moment, GyLogSync is available for Mac only.
-
Gyroflow Desktop Use this to load the video file and the matching
.gcsv, check sync, load a lens profile if needed, and save a.gyroflowfile. -
External USB-C storage ProRes RAW recording on iPhone requires compatible external storage and a suitable USB-C cable. Check recording before important shoots.
-
Video editing software Use a video editor that supports a Gyroflow plugin, such as DaVinci Resolve. This page uses DaVinci Resolve as the example. For full-resolution Open Gate work in DaVinci Resolve, use DaVinci Resolve Studio; the free version is limited to Ultra HD 3840x2160 output.
-
Lens profiles At the moment, the 24mm lens profile is the recommended profile for this workflow. Load it in Gyroflow Desktop or in the Gyroflow plugin inside your video editor. 100mm and 13mm are not recommended for this workflow yet. Better profiles may be shared later.
Blackmagic Camera Settings
Check these settings before recording.
| Setting | Recommendation |
|---|---|
| Codec | Apple ProRes RAW |
| Resolution | Open Gate |
| Color | Apple Log or Apple Log 2 |
| Reference Source | Internal |
| Shutter Speed | 1/120 sec or faster |
| Stabilization | Off |
Reference Source
Set Reference Source to Internal.
If it is left as None, the frame timing of ProRes RAW may become unstable, and Gyroflow stabilization may not align correctly.
Shutter Speed
Use 1/120 sec or faster as a starting point.
If the shutter speed is too slow, motion blur will remain in the footage. Gyroflow can stabilize camera movement, but it cannot restore frames that are already blurred.
Stabilization
Turn Blackmagic Camera stabilization Off when testing the GyLog and Gyroflow workflow.
If camera-side stabilization and Gyroflow stabilization are both applied, Gyroflow may not be able to correct the motion properly.
Note
With ProRes RAW on iPhone 17 Pro, turning Stabilization off appears to effectively disable sensor correction and lens correction in practical use. This behavior has not been fully confirmed, so treat it as a practical working assumption rather than a formal specification.
Record With GyLog
- Open GyLog on the iPhone.
- Tap Start.
- Switch to Blackmagic Camera.
- Record the video clips.
- When shooting is finished, return to GyLog.
- Tap Stop.
- From the Files screen, send the
.gcsvfile to your computer.
One GyLog recording can cover multiple video clips. Start GyLog before the first video clip, and stop it after the last video clip.
The log is saved periodically, so already recorded log data should remain even if recording is interrupted. For important shoots, record in shorter sections and occasionally check that GyLog is still running in the background.
When audio recording is also enabled, gyro logging tends to be more stable. Continuous logging for about two hours has been confirmed in testing.
Create Per-Clip .gcsv Files With GyLogSync
On your computer, put the video files and the GyLog .gcsv file in the same folder.
You can drop the whole folder into GyLogSync, or you can drop the video files and .gcsv file directly. You can also process multiple video files and multiple .gcsv files at once.
Back Up Important Footage
GyLogSync may directly modify video file metadata in order to fix ProRes RAW frame timing. The video and audio data themselves are not changed, but for important footage, keep a backup on another drive before processing.
- Open GyLogSync on your computer.
- Drop in the video files and
.gcsvfile, or the folder containing them. - At first, leave Time Offset in Advanced Options at
0.0. - Turn on Process Audio only if you need it.
- Press Sync.
When processing is finished, GyLogSync creates a .gcsv file for each video clip. Each .gcsv includes about 5 seconds of extra log data before and after the video clip.
Use the per-clip .gcsv files in Gyroflow Desktop.
Create a .gyroflow File in Gyroflow Desktop
- Open Gyroflow Desktop.
- Load the video file.
- Load the matching
.gcsvfile created by GyLogSync. - Load a lens profile if needed.

Lens Profiles
For 24mm footage, load the 24mm lens profile and check whether the correction looks natural.
- 24mm: Recommended for now because it gives good results.
- 100mm: Not recommended yet. It is on the telephoto side, where stabilization in Gyroflow can become difficult.
- 13mm: Not recommended yet. The distortion is strong, and this workflow does not yet produce stable results with the current profile.
- Better 100mm and 13mm profiles may be shared later.
IMU Orientation
Right-click on the timeline and run Guess IMU orientation here.
For normal iPhone-only shooting, the IMU orientation is often XYZ.
Sync
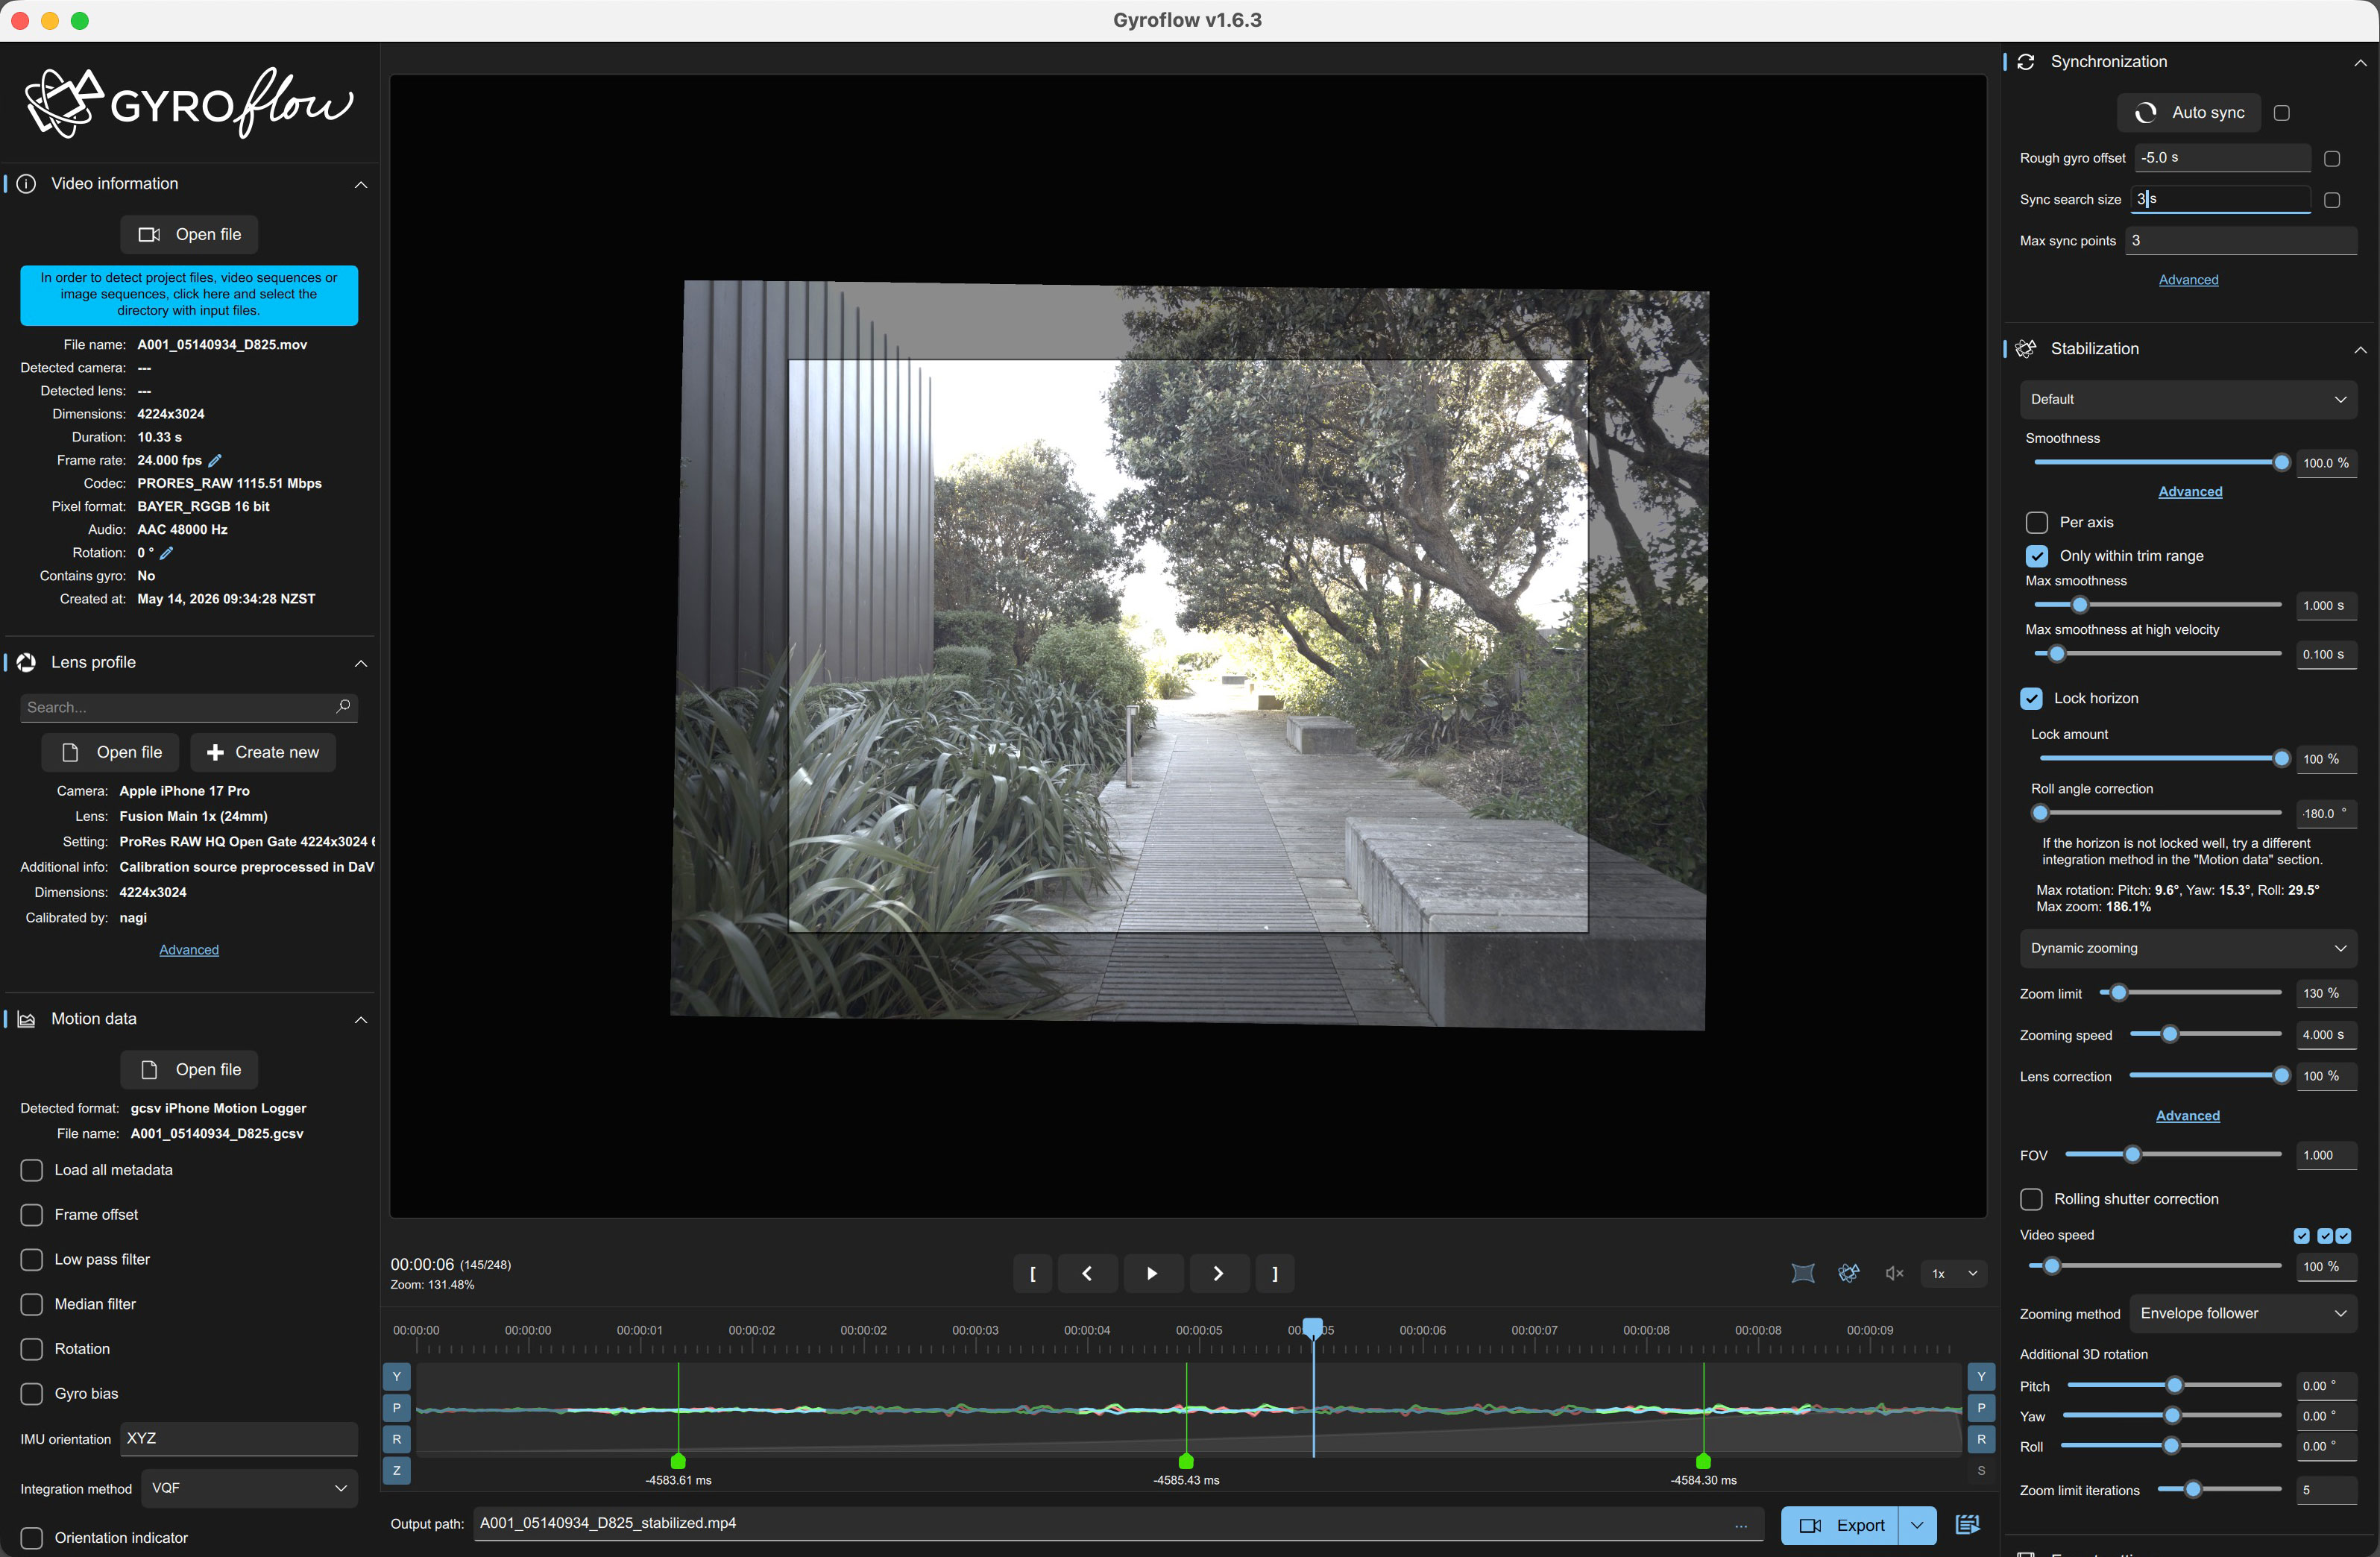
The .gcsv created by GyLogSync includes about 5 seconds before the video starts and about 5 seconds after it ends.
Because of this, set Rough gyro offset to -5.0 seconds in Gyroflow Desktop, then press Auto sync.
If Auto sync works correctly, the numbers under the green sync points on the timeline should be close to each other.
After sync, adjust Smoothness, FOV, Crop, and related settings, then check whether the stabilization looks natural.
Rolling Shutter
If rolling shutter correction is needed, adjust it in Gyroflow Desktop.
For iPhone-only footage, the rolling shutter effect is relatively small, so it is usually okay to leave it unset at first.
Other adjustments can be made in Gyroflow Desktop, but they can also be adjusted later in a Gyroflow plugin inside a compatible video editor.
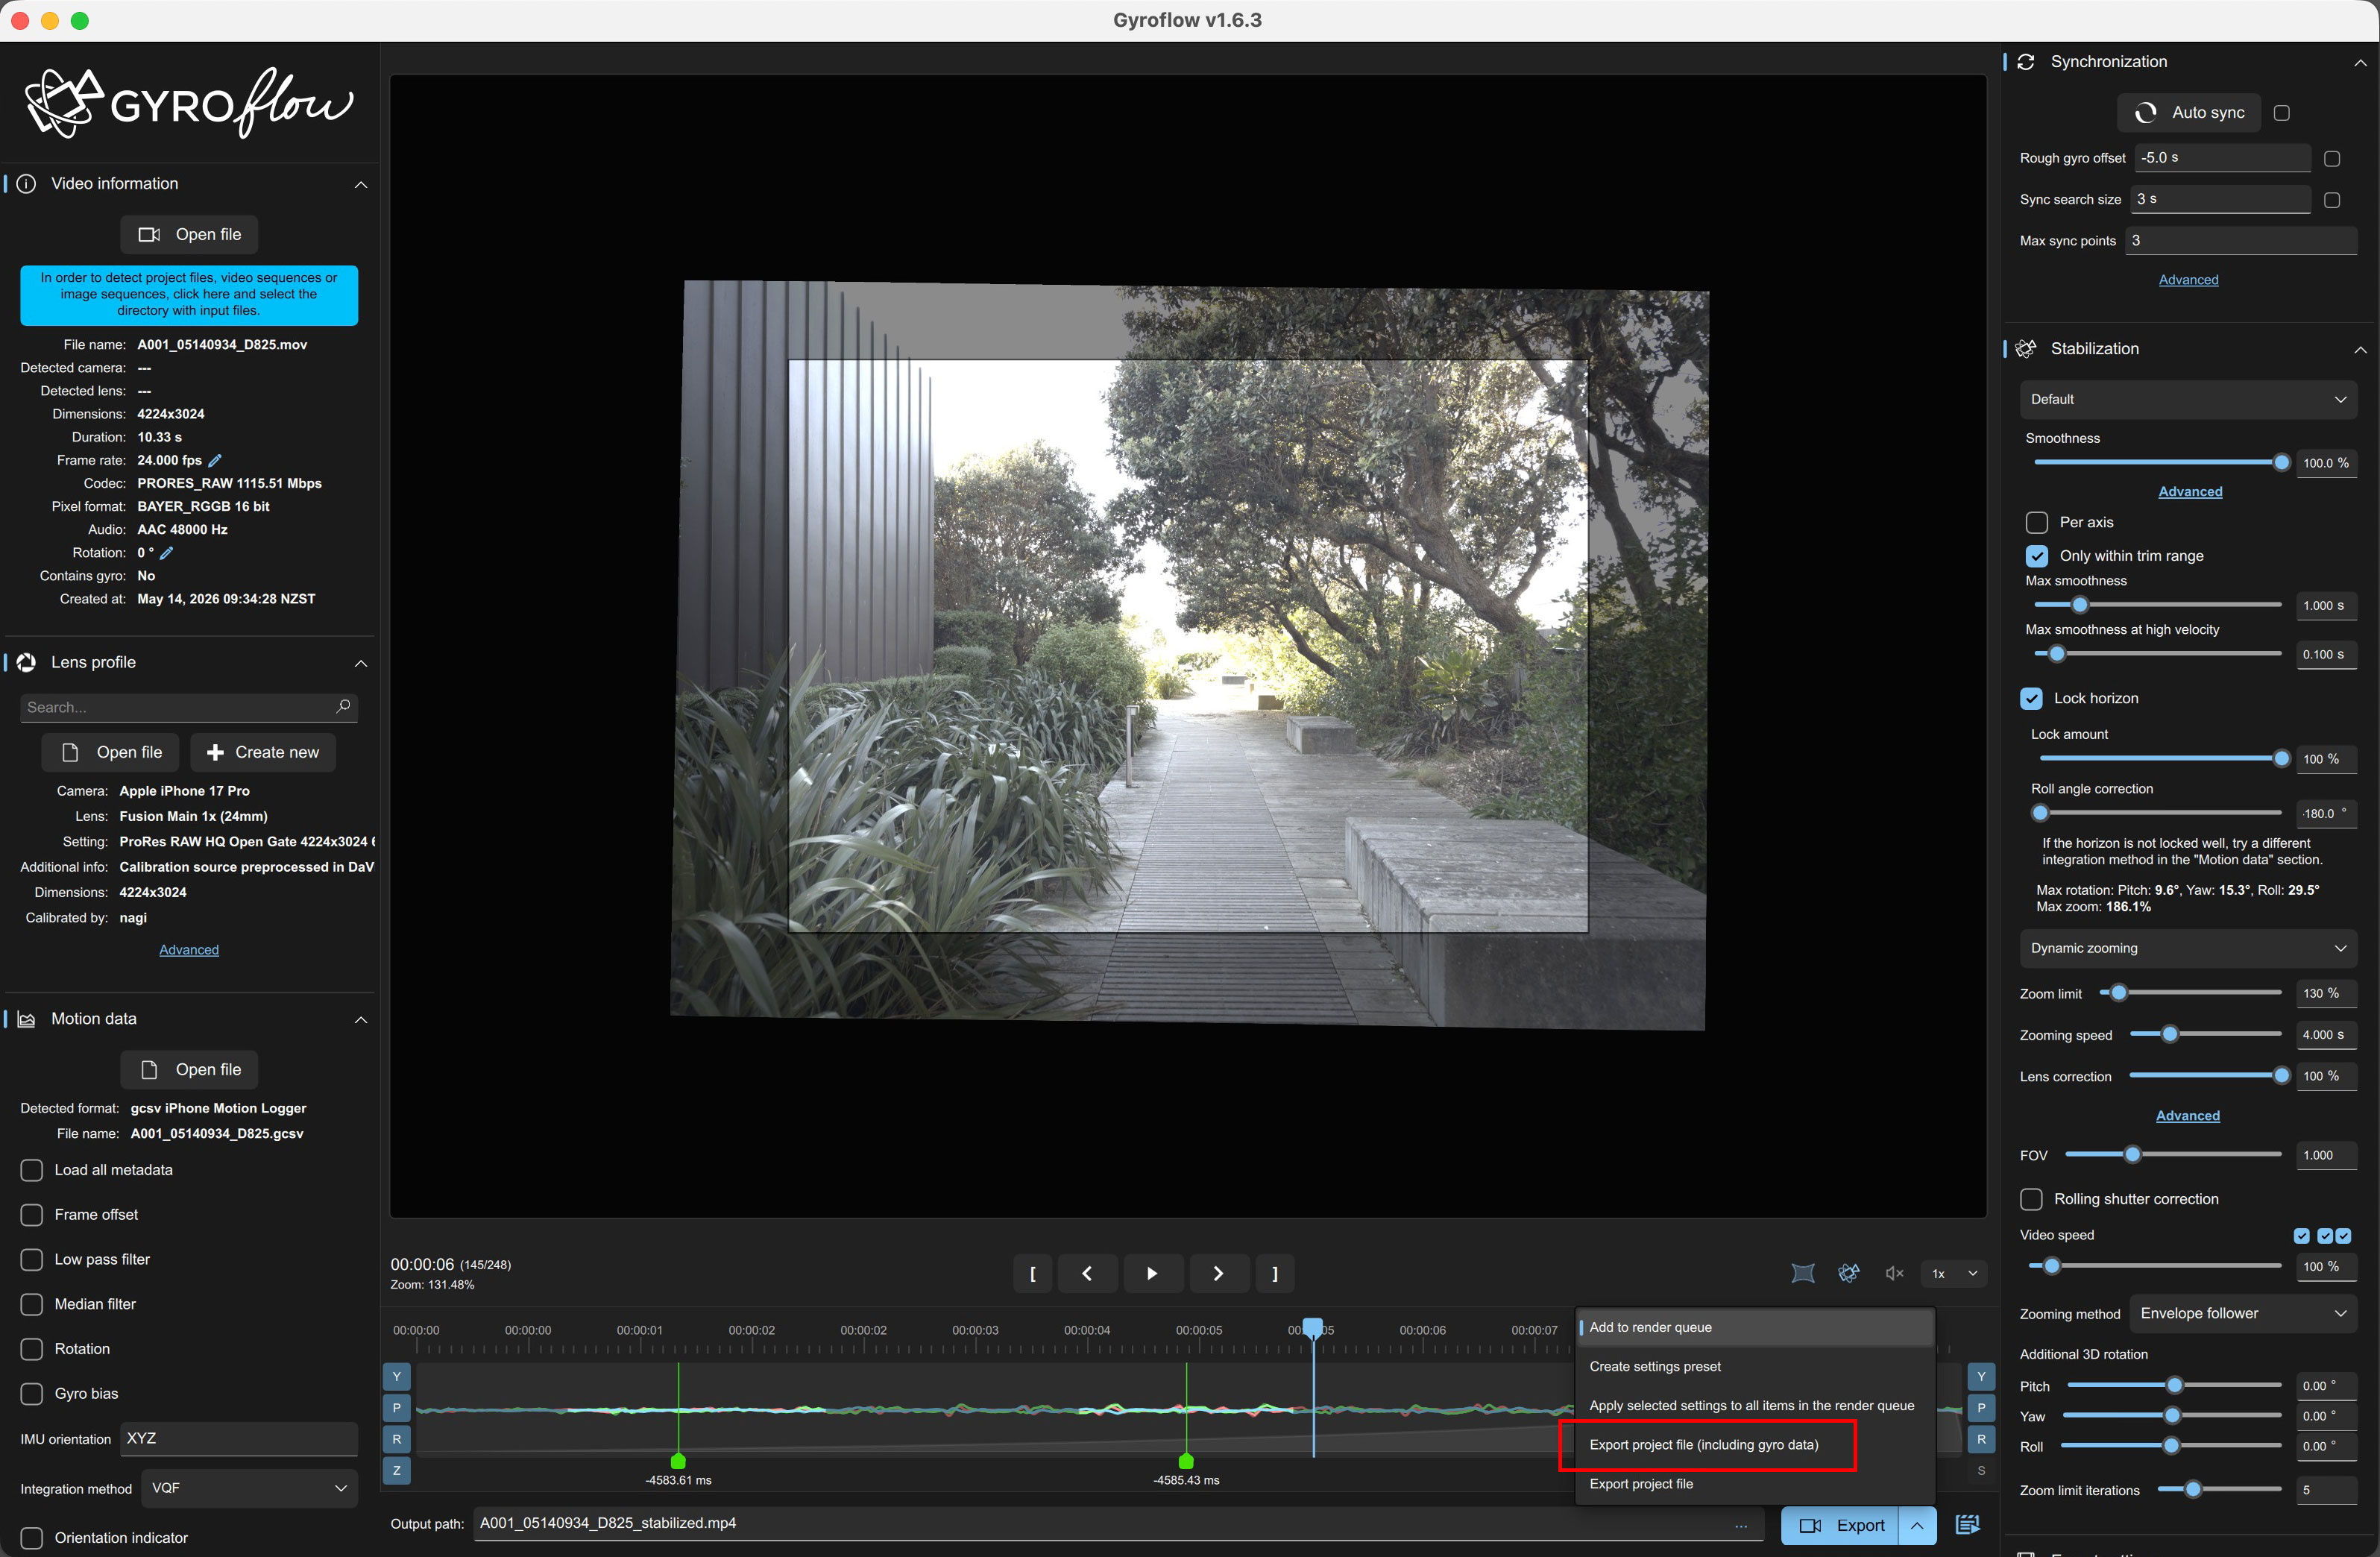
When everything looks good, choose Export project file (including gyro data) and save a .gyroflow file.
Check in a Video Editor (DaVinci Resolve Example)
- Open DaVinci Resolve.
- Put the video on the timeline.
- Open the Color page.
- Add the Gyroflow OFX plugin to a node.
- In the Gyroflow plugin, load the
.gyroflowfile saved from Gyroflow Desktop. - If needed, load the lens profile in the same Gyroflow plugin.
- Adjust Smoothness, FOV, Crop, and related settings to get the stabilization you prefer.
For full-resolution iPhone Open Gate work, use DaVinci Resolve Studio. The free version of DaVinci Resolve is limited to Ultra HD 3840x2160 output.
If needed, use the iPhone ProRes RAW PowerGrade:
Download iPhone ProRes RAW PowerGrade
This PowerGrade is a simple starting point for converting Apple Log / Apple Log 2 to DaVinci Wide Gamut and then to Rec.709.
What to Check
After applying the workflow, check these points:
- The shot stabilizes naturally.
- The crop is not too heavy.
- Vertical lines do not wobble unnaturally.
- The edge of the frame does not look stretched or distorted.
- The lens profile improves the image instead of making it worse.
Troubleshooting
If stabilization does not look right, check these items first:
- Blackmagic Camera stabilization was turned off.
- Reference Source was set to Internal.
- Shutter speed was fast enough to avoid heavy motion blur.
- The correct video and matching per-clip
.gcsvwere loaded. - Rough gyro offset was set to
-5.0seconds before Auto sync. - IMU orientation was guessed and confirmed.
- The lens profile matches the lens and recording mode.
When asking for support, prepare the original video file, the .gcsv created by GyLogSync, and the saved .gyroflow file.